
How CastLock actually works.
A reference guide, organized by app area and written from hands-on testing of the real app. It's not a marketing walkthrough, so if something below looks different from what's on your screen, trust the app first — it's always the source of truth.
Workspaces
A Workspace is the top-level container in CastLock. Every Project, Cast Group, and Character you create belongs to exactly one Workspace, and there's no shared pool sitting behind the scenes. Switch workspaces, and your whole Projects list and Cast Library switch with it — nothing from one ever shows up in another.
That separation is useful once you're juggling more than one kind of project. Say you're illustrating a children's-book series on the side while also doing paid character work for a client. Keep each in its own workspace, and the client's cast will never show up while you're browsing the book's.
Creating and switching workspaces
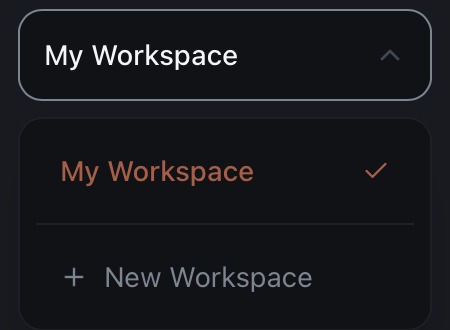
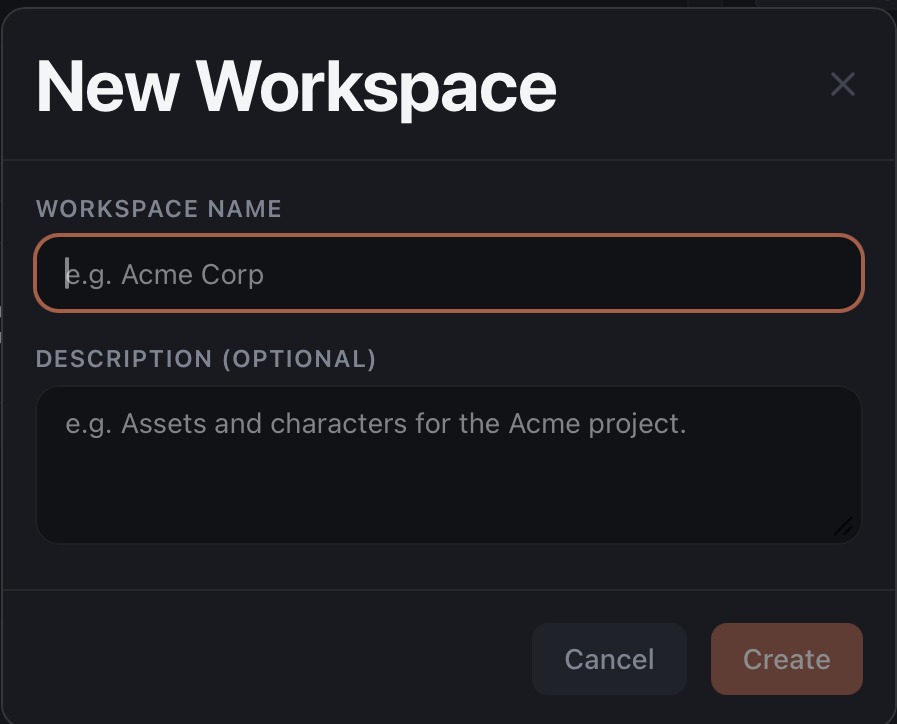
To switch workspaces, click the workspace name at the top of the sidebar. That opens a switcher listing every workspace you've created, with a checkmark next to whichever one is active. Click any other name and CastLock switches instantly, with no loading delay to wait through. To start a new one, click "+ New Workspace" and fill in a name and, if you want, a short description.

Deleting a workspace
Hover over a workspace in the switcher, and edit and delete icons appear.
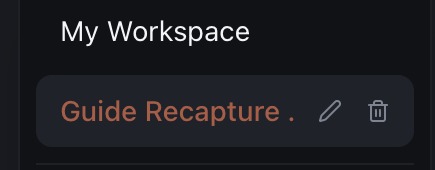
If the workspace is empty, clicking delete removes it right away, with no confirmation dialog to click through. If it still holds any projects, cast groups, or characters, CastLock blocks the deletion outright and shows you a warning naming exactly what's still inside, so you know what to clear out first.
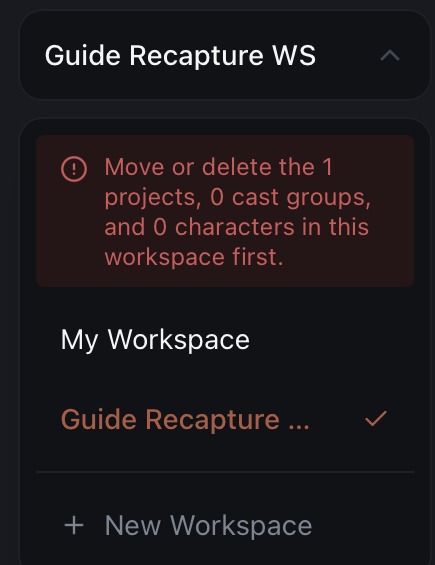
No cascading delete, ever. CastLock will never delete your creative work just because you deleted the workspace it's sitting in. You always have to clear a workspace out yourself before it can go. Your first workspace starts out named "My Workspace," and you can rename it any time.
Projects
Creating a project
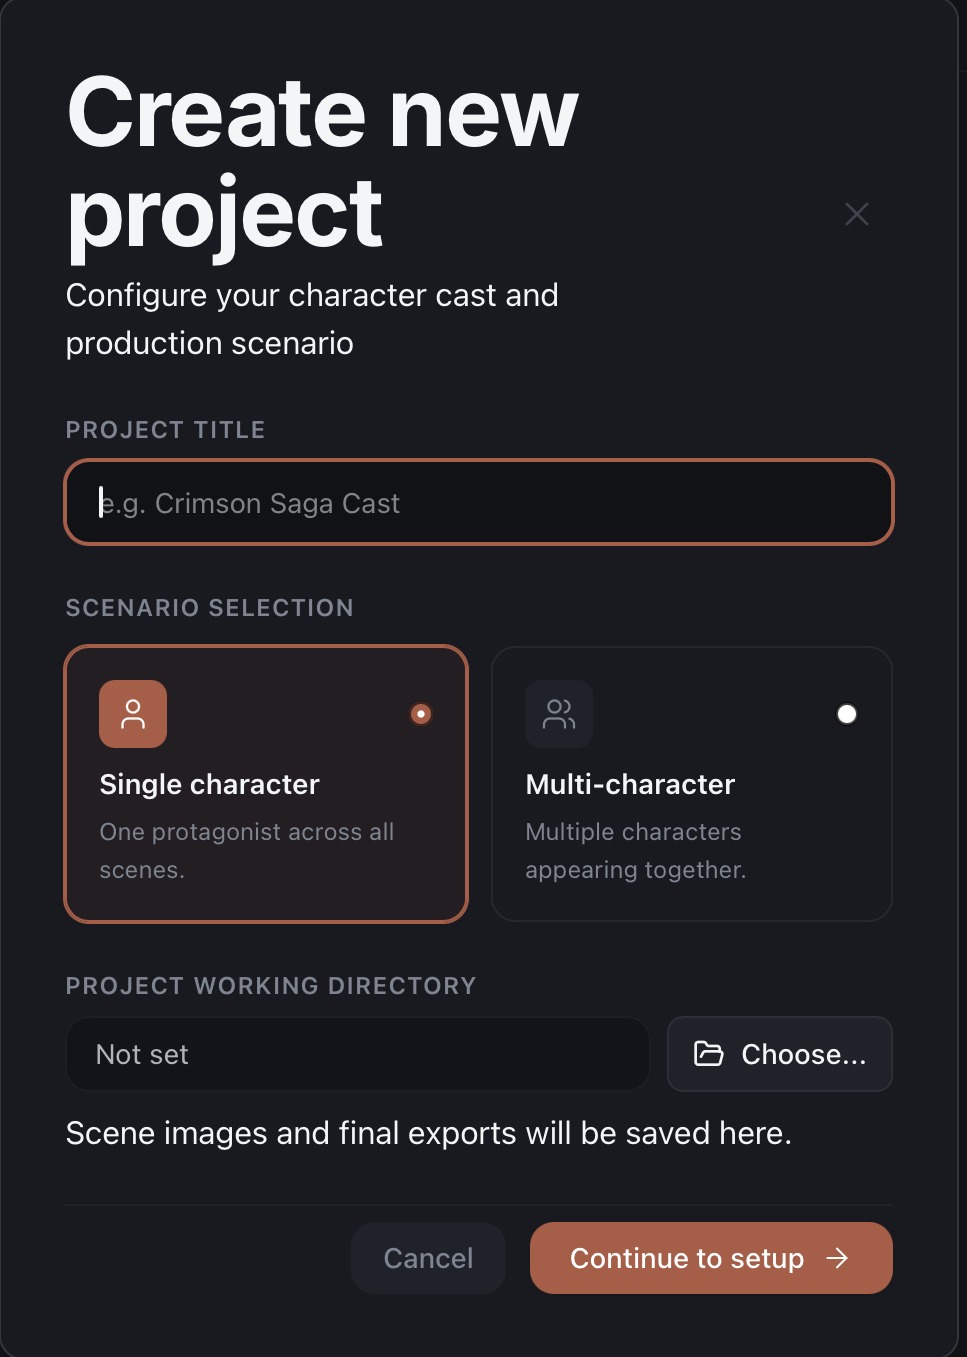
Click "Create New Project" to start. Give it a title, then choose a scenario type: single character if one protagonist carries every scene, or multi-character if more than one character appears together. Last, pick a working directory — this is where CastLock will save the images and reference materials this project generates.
The setup form
The setup form has four sections, and all of them live on one scrollable page, so you can fill it out top to bottom without hopping between screens.
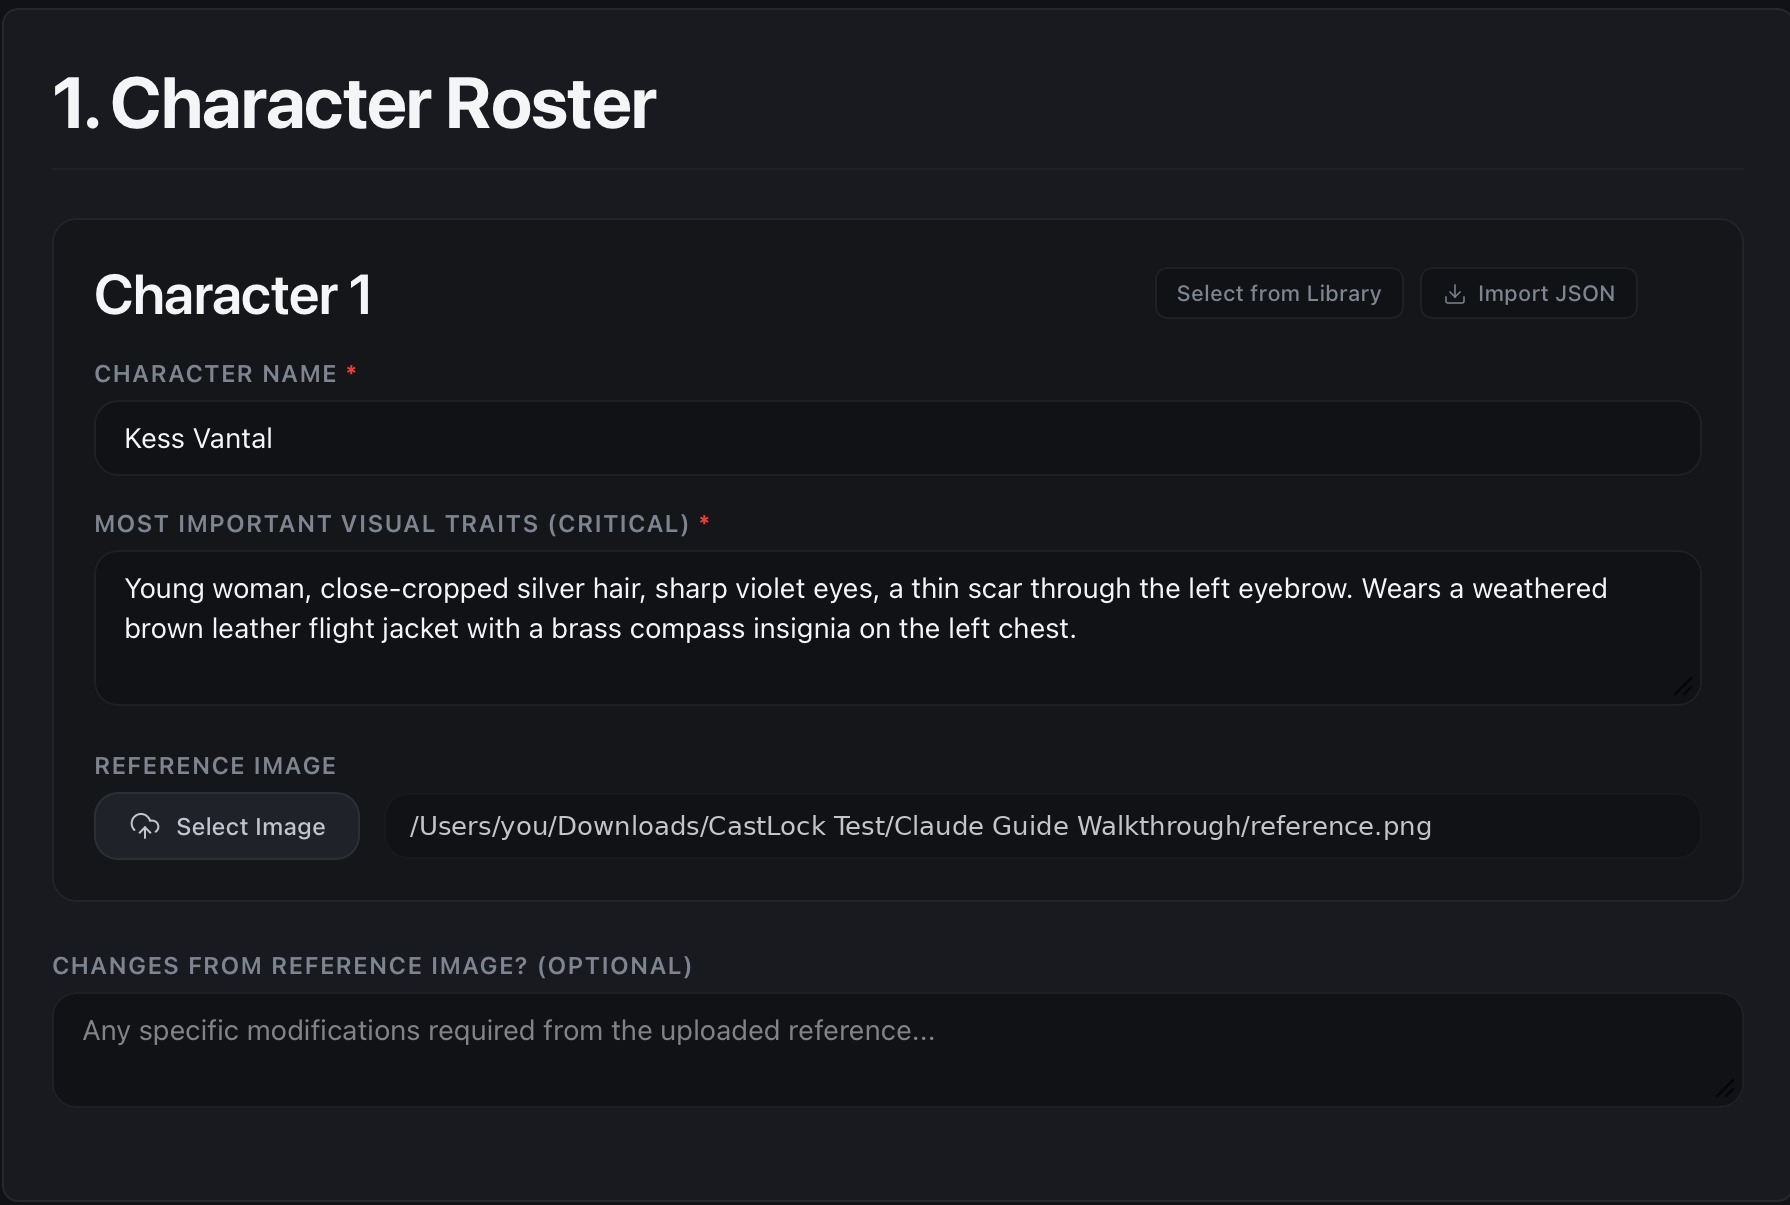
Character Roster comes first. Each character gets its own card, where you add a name, the character's "most important visual traits" (the handful of details that absolutely can't vary), and an optional reference image. Next to the name field are two shortcuts worth knowing about: click Select from Library to pull in a character you've already built, which auto-fills their name and traits for you, or click Import JSON to load a character preset you exported earlier, through your Mac's native file picker.
If you set the project to multi-character, a Pairwise Relationships field shows up below the roster. Use it to describe how the characters relate to each other physically in frame — who's taller, who's standing where — and CastLock folds that description into the compiled extraction prompt automatically.
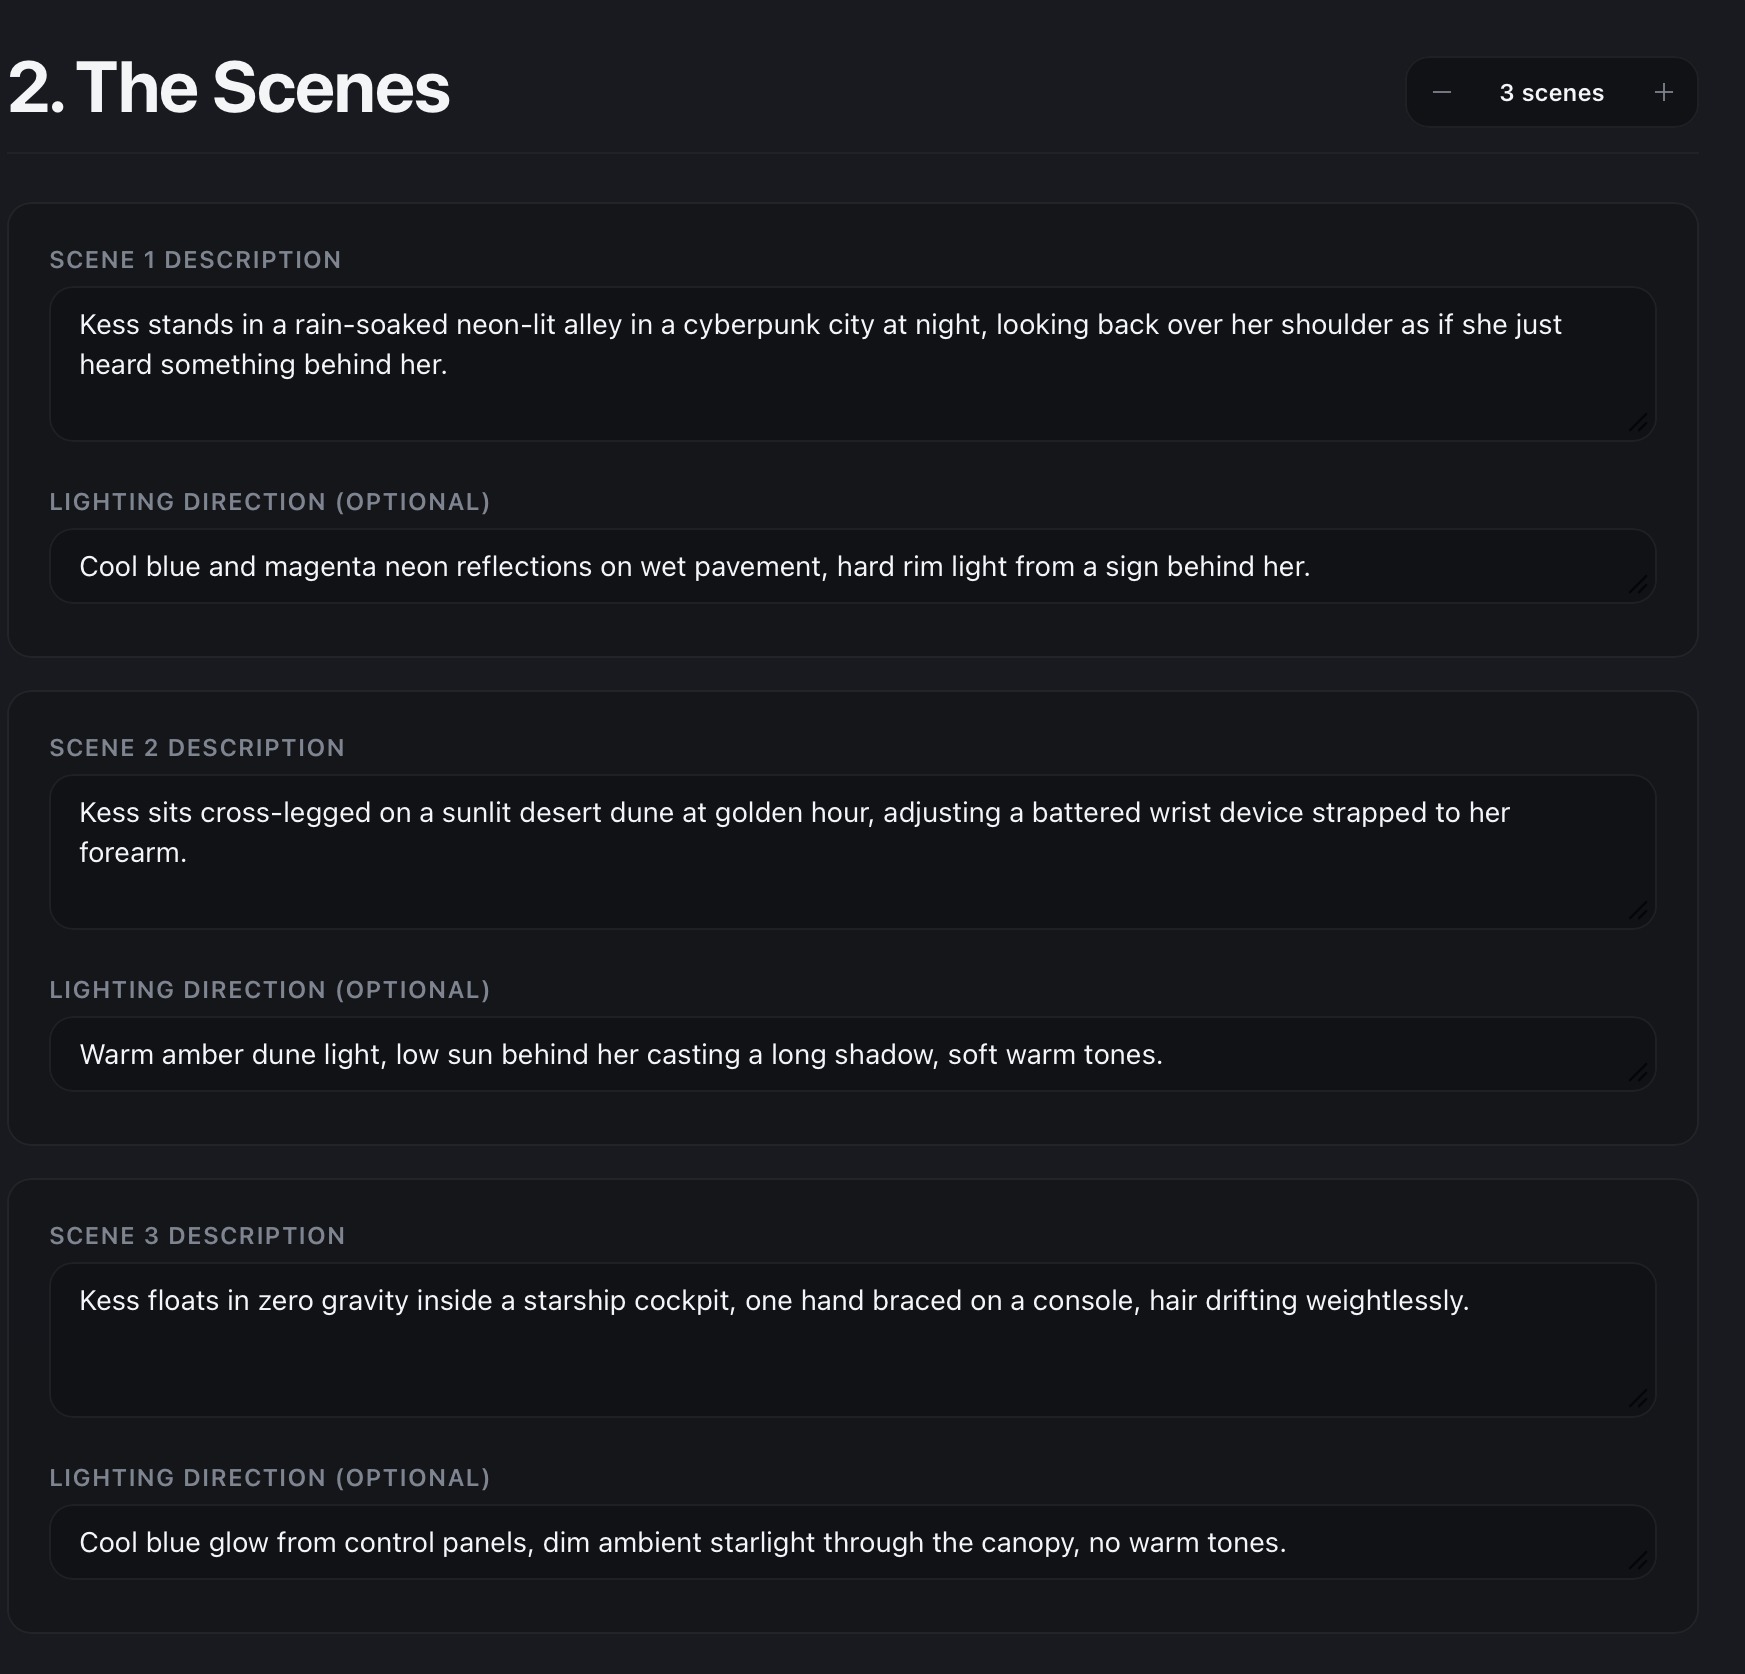
The Scenes section works the same way: one card per scene, with a stepper at the top to add or remove them as you go. For each scene, write a description, add lighting direction if you want to control it, and check off which roster characters actually appear in that scene.
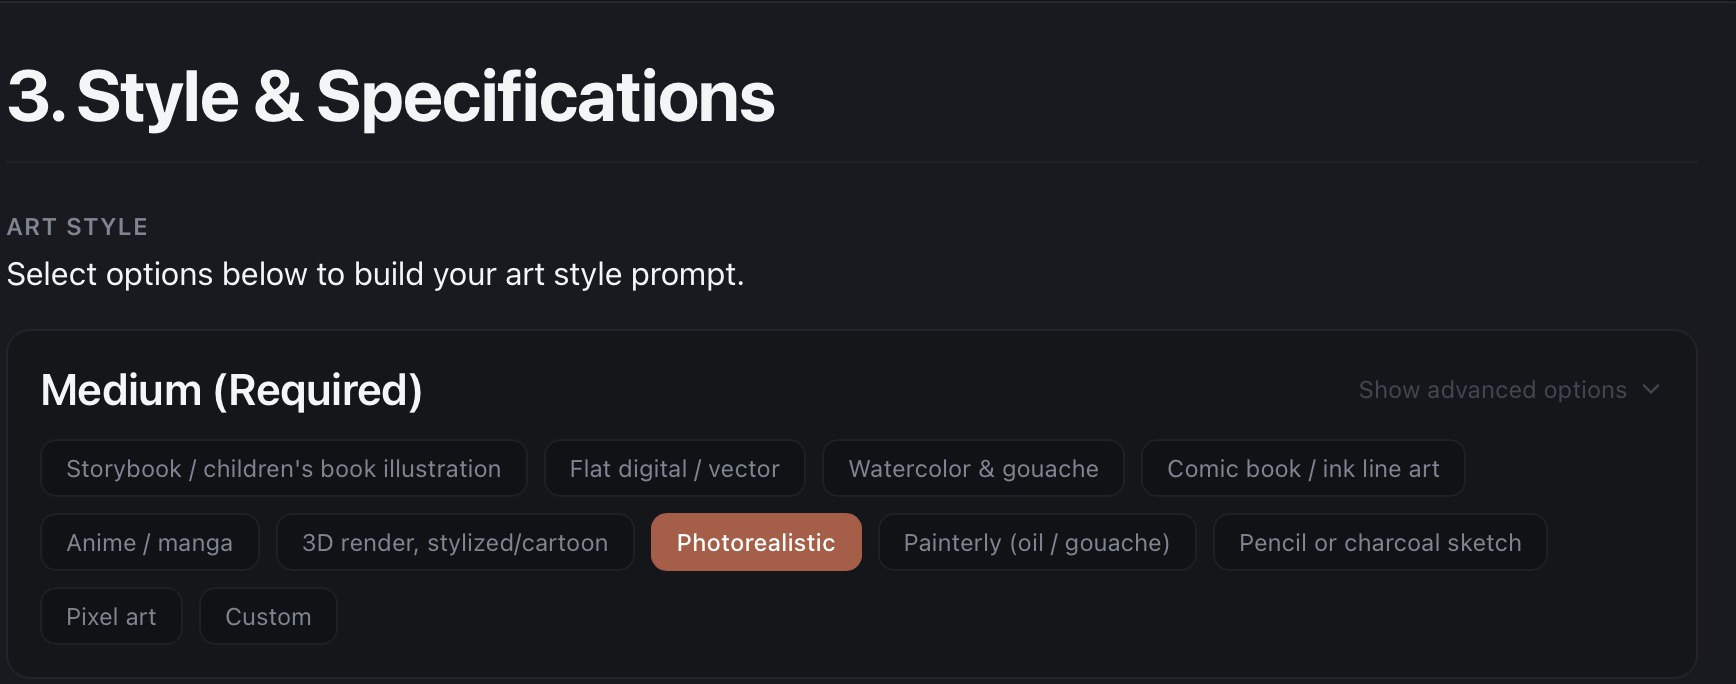
Style & Specifications is where you set the overall look. Pick a Medium (this one's required), then Color & Mood, Line Style, and Lighting to taste. Everything you choose compiles live into a Compiled Style Prompt Preview, so you can read exactly what you're about to lock in before you save. Set your target output dimensions and toggle a transparent background per image here too.

Local Files is the last section, and it's mostly a confirmation: it shows you the working directory where this project's generated images and reference materials will land.
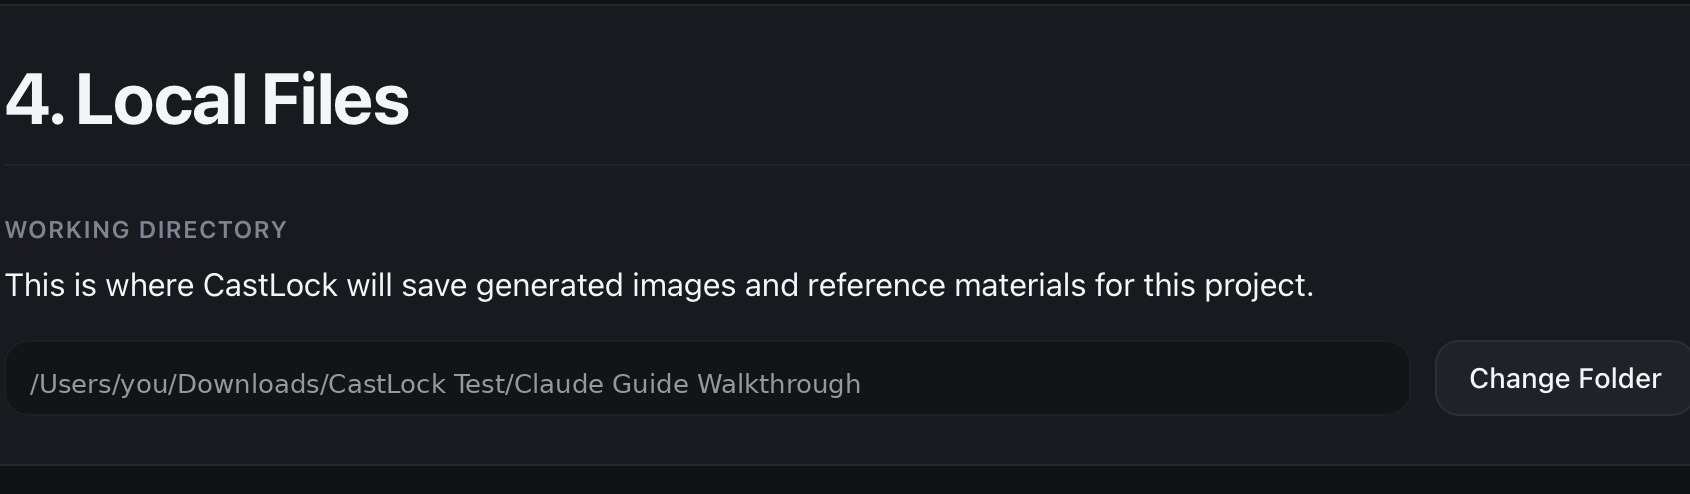
Extraction Hub
Once you save the setup form, every character in the roster goes through its own two-step extraction. Step 1: copy the full compiled prompt CastLock builds for that character, and run it through Gemini or ChatGPT with the character's reference image attached. That prompt is made up of three required parts, each wrapped in exact delimiters: a JSON schema block, a CHARACTER_OVERVIEW block, and an IDENTITY_RULES block. Copy all three into the AI tool together — leave one out, and the response will fail to parse without telling you which part you missed.
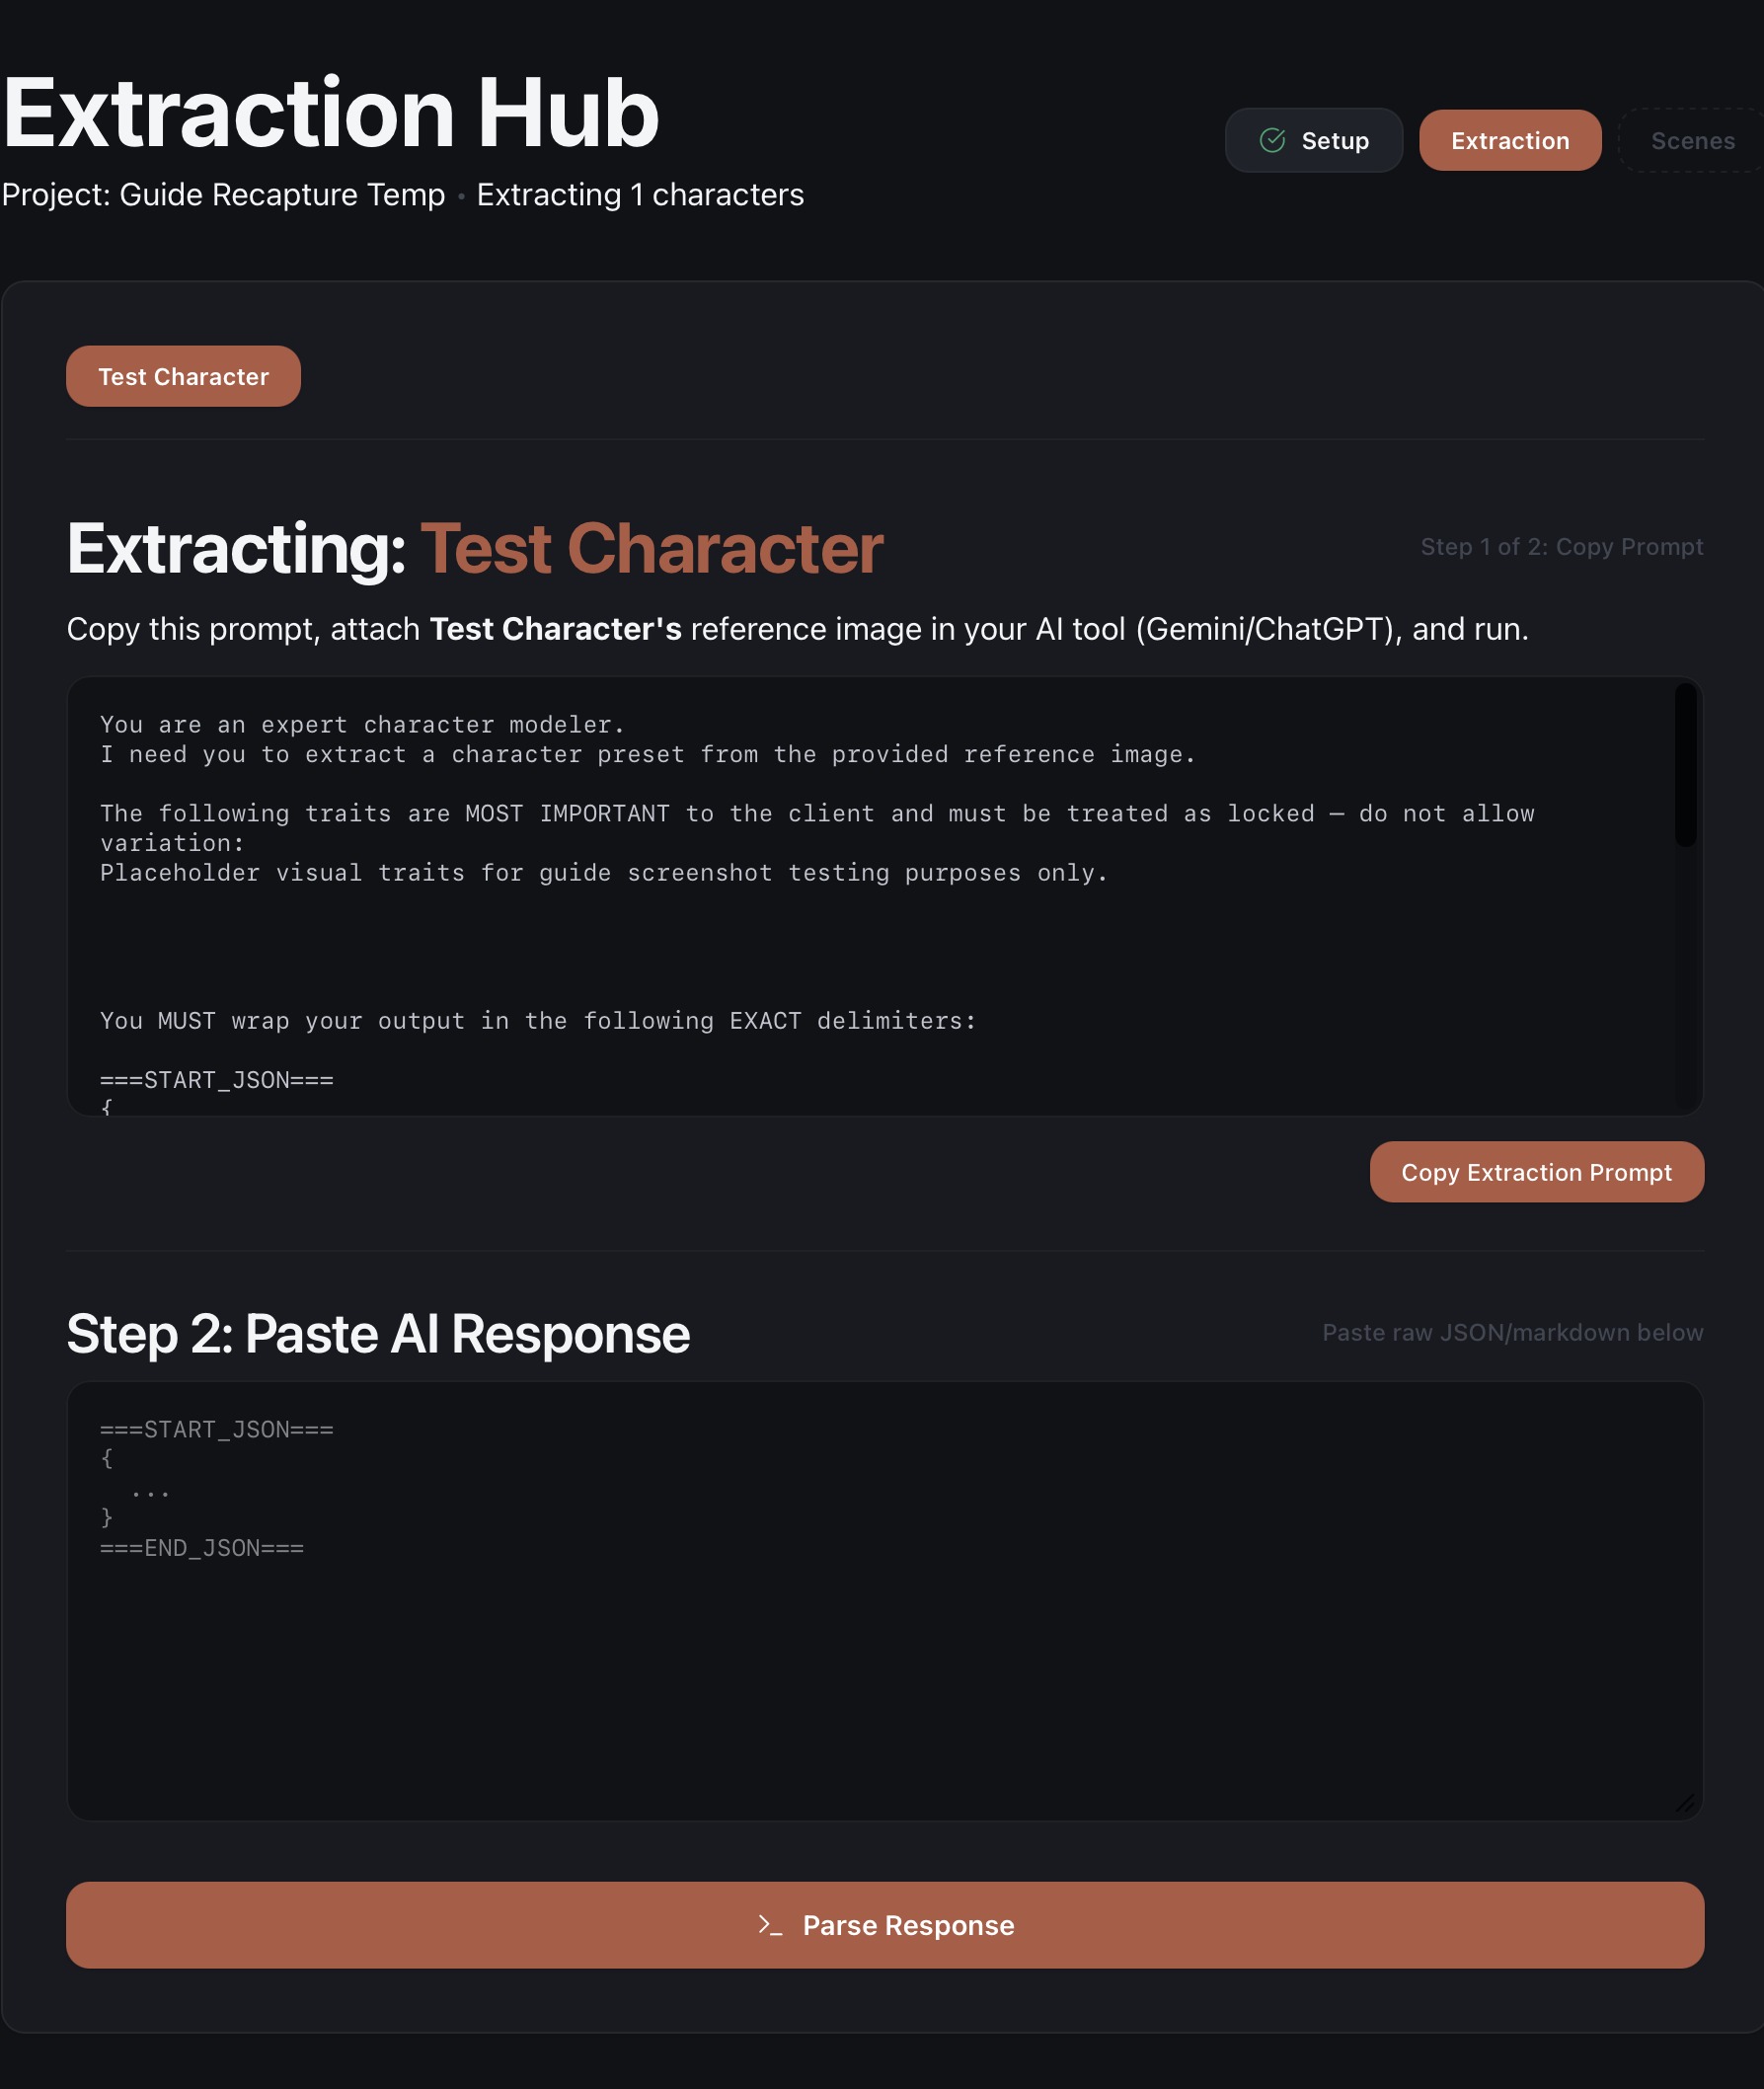
Step 2: paste the AI's raw response back into CastLock and click Parse Response. If you pulled a character in through Select from Library, it already carries an EXTRACTED status, so it skips this whole flow.
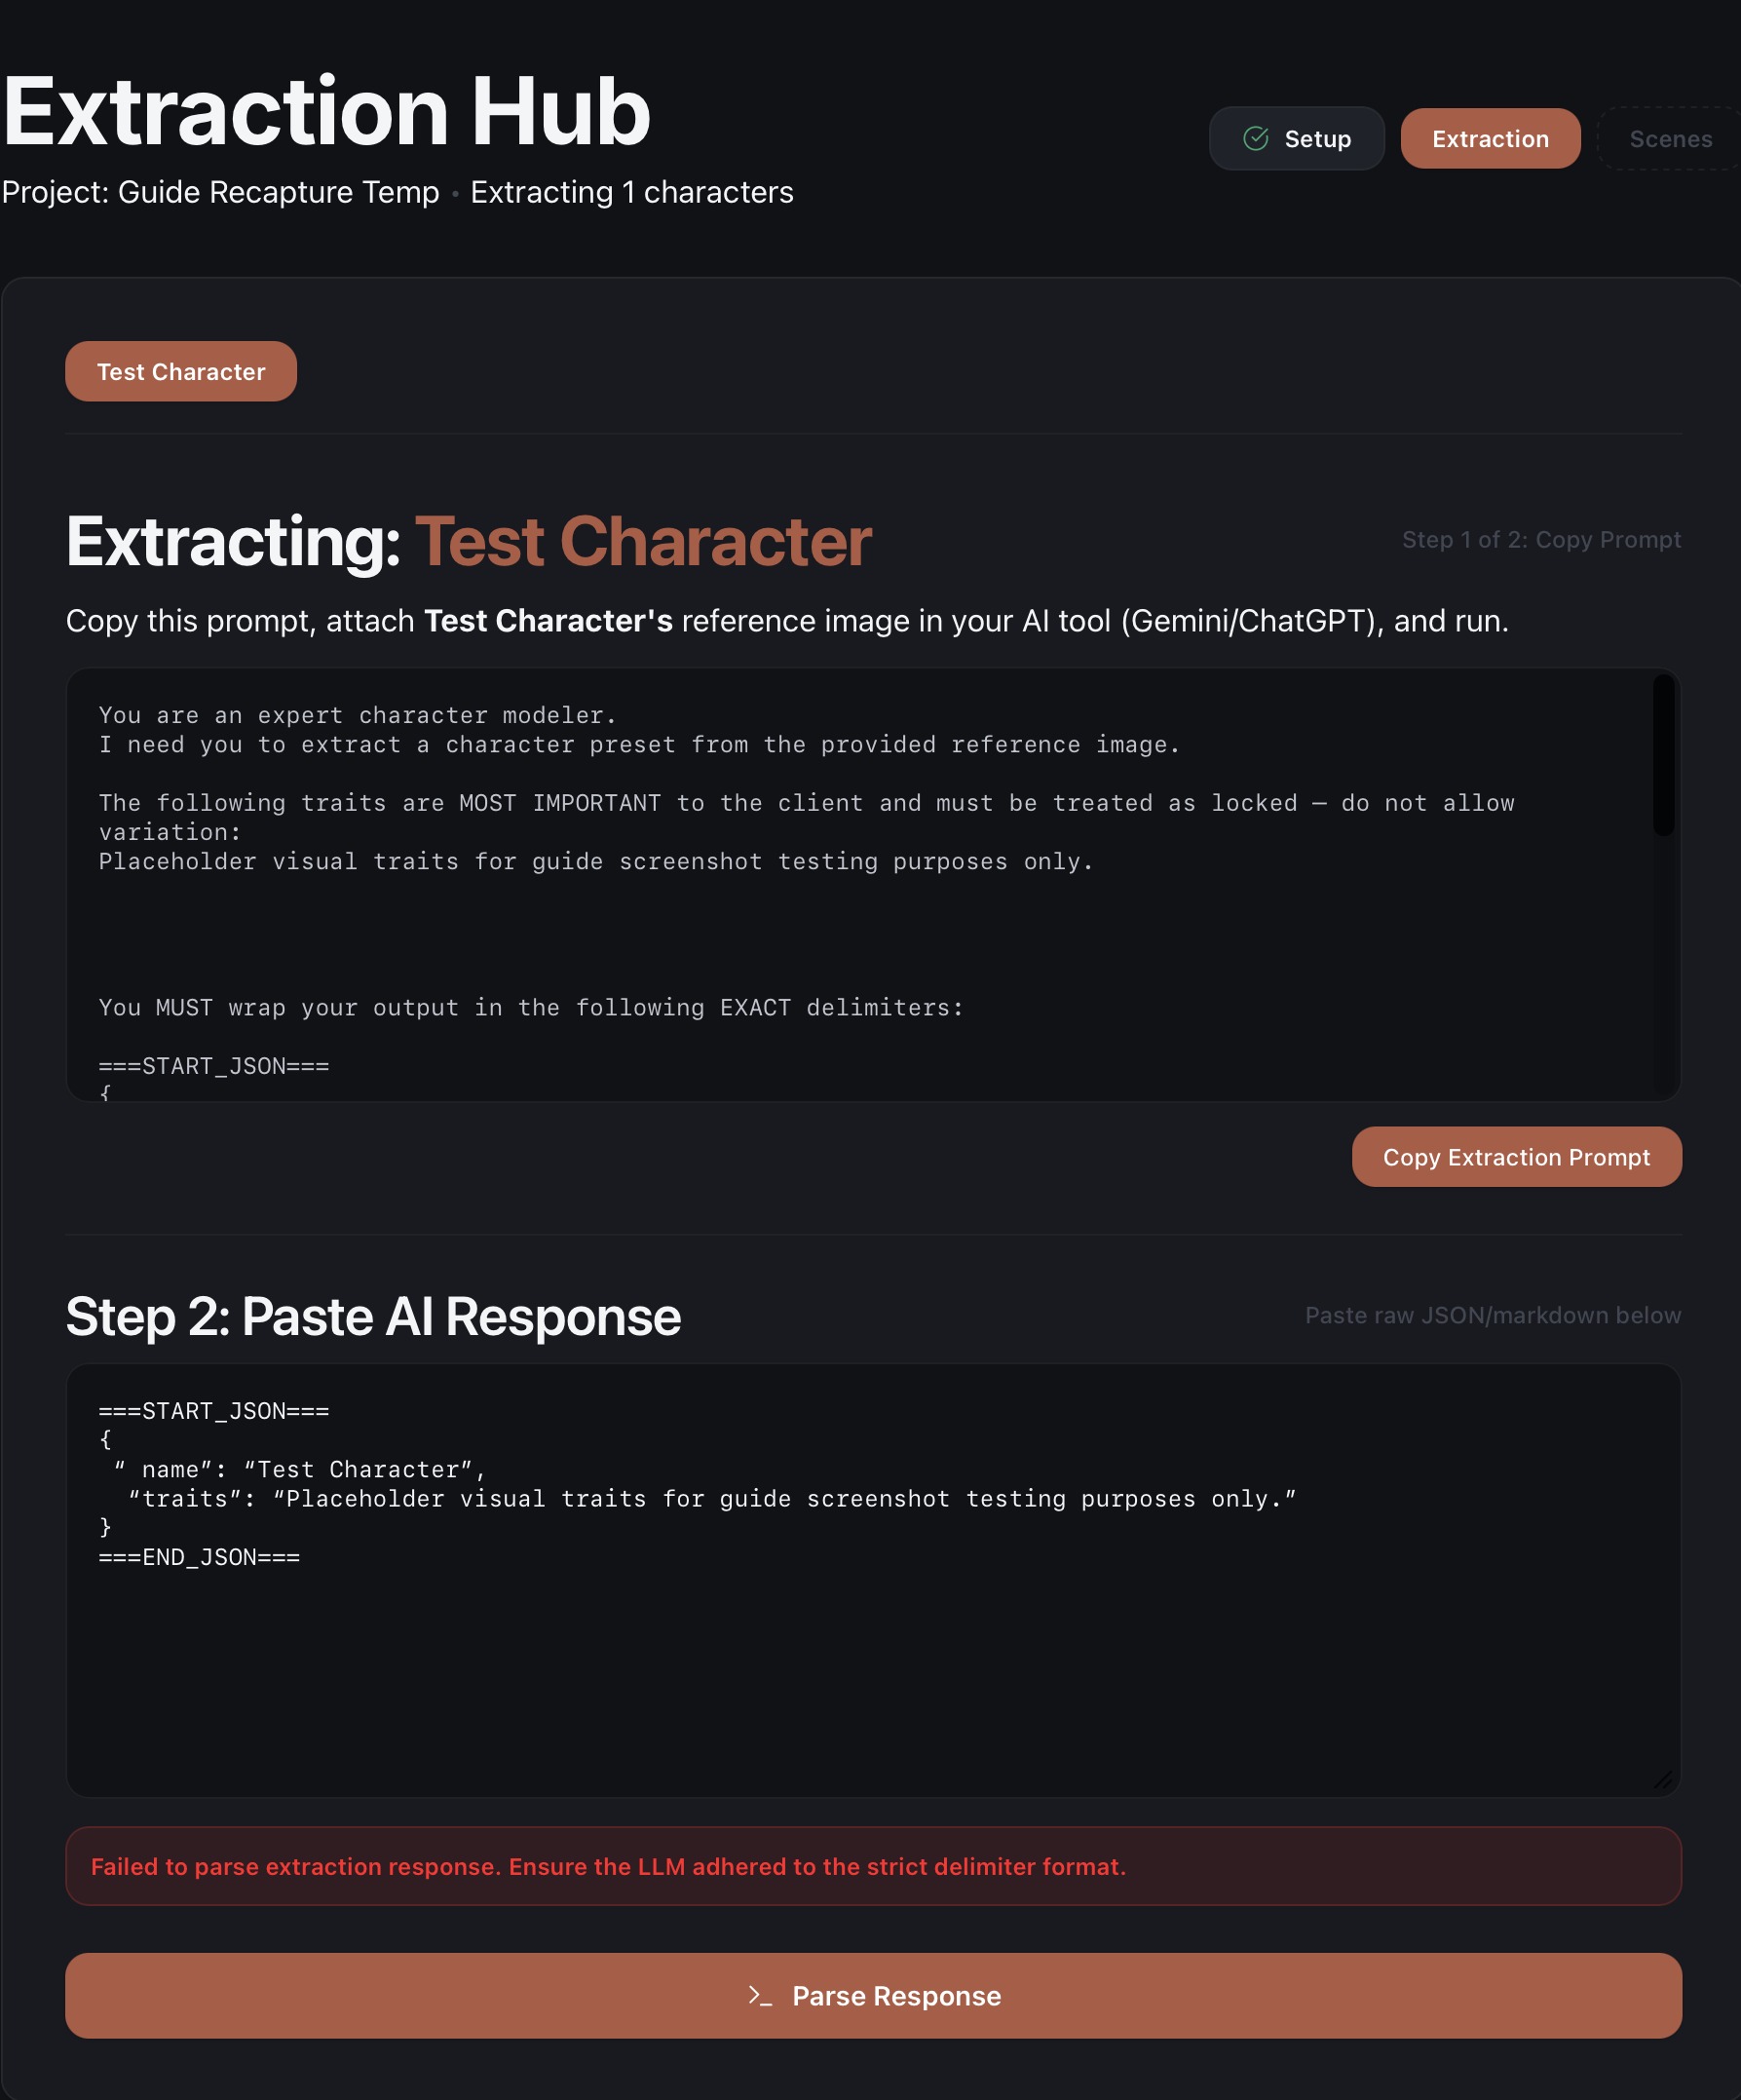
Known gotcha, confirmed directly: type text into the paste field instead of pasting an actual clipboard copy, and macOS will quietly swap your straight quotes for curly ones inside the JSON. That's enough to break the strict parser. Always paste from a real copy, never retype it — the screenshot above shows exactly what that corruption looks like when it happens.
Two things make extraction go smoother. Reference image quality matters most right here: a clear, well-lit photo produces a far more precise character preset than a blurry or heavily stylized one, so it's worth spending the effort before you run the prompt. And when you fill in locked traits, use them for the two or three details that genuinely can't drift, not everything about the character — locked traits get explicit priority in the extraction prompt, so the more you mark, the more the AI has to juggle at once.
Scene Dashboard
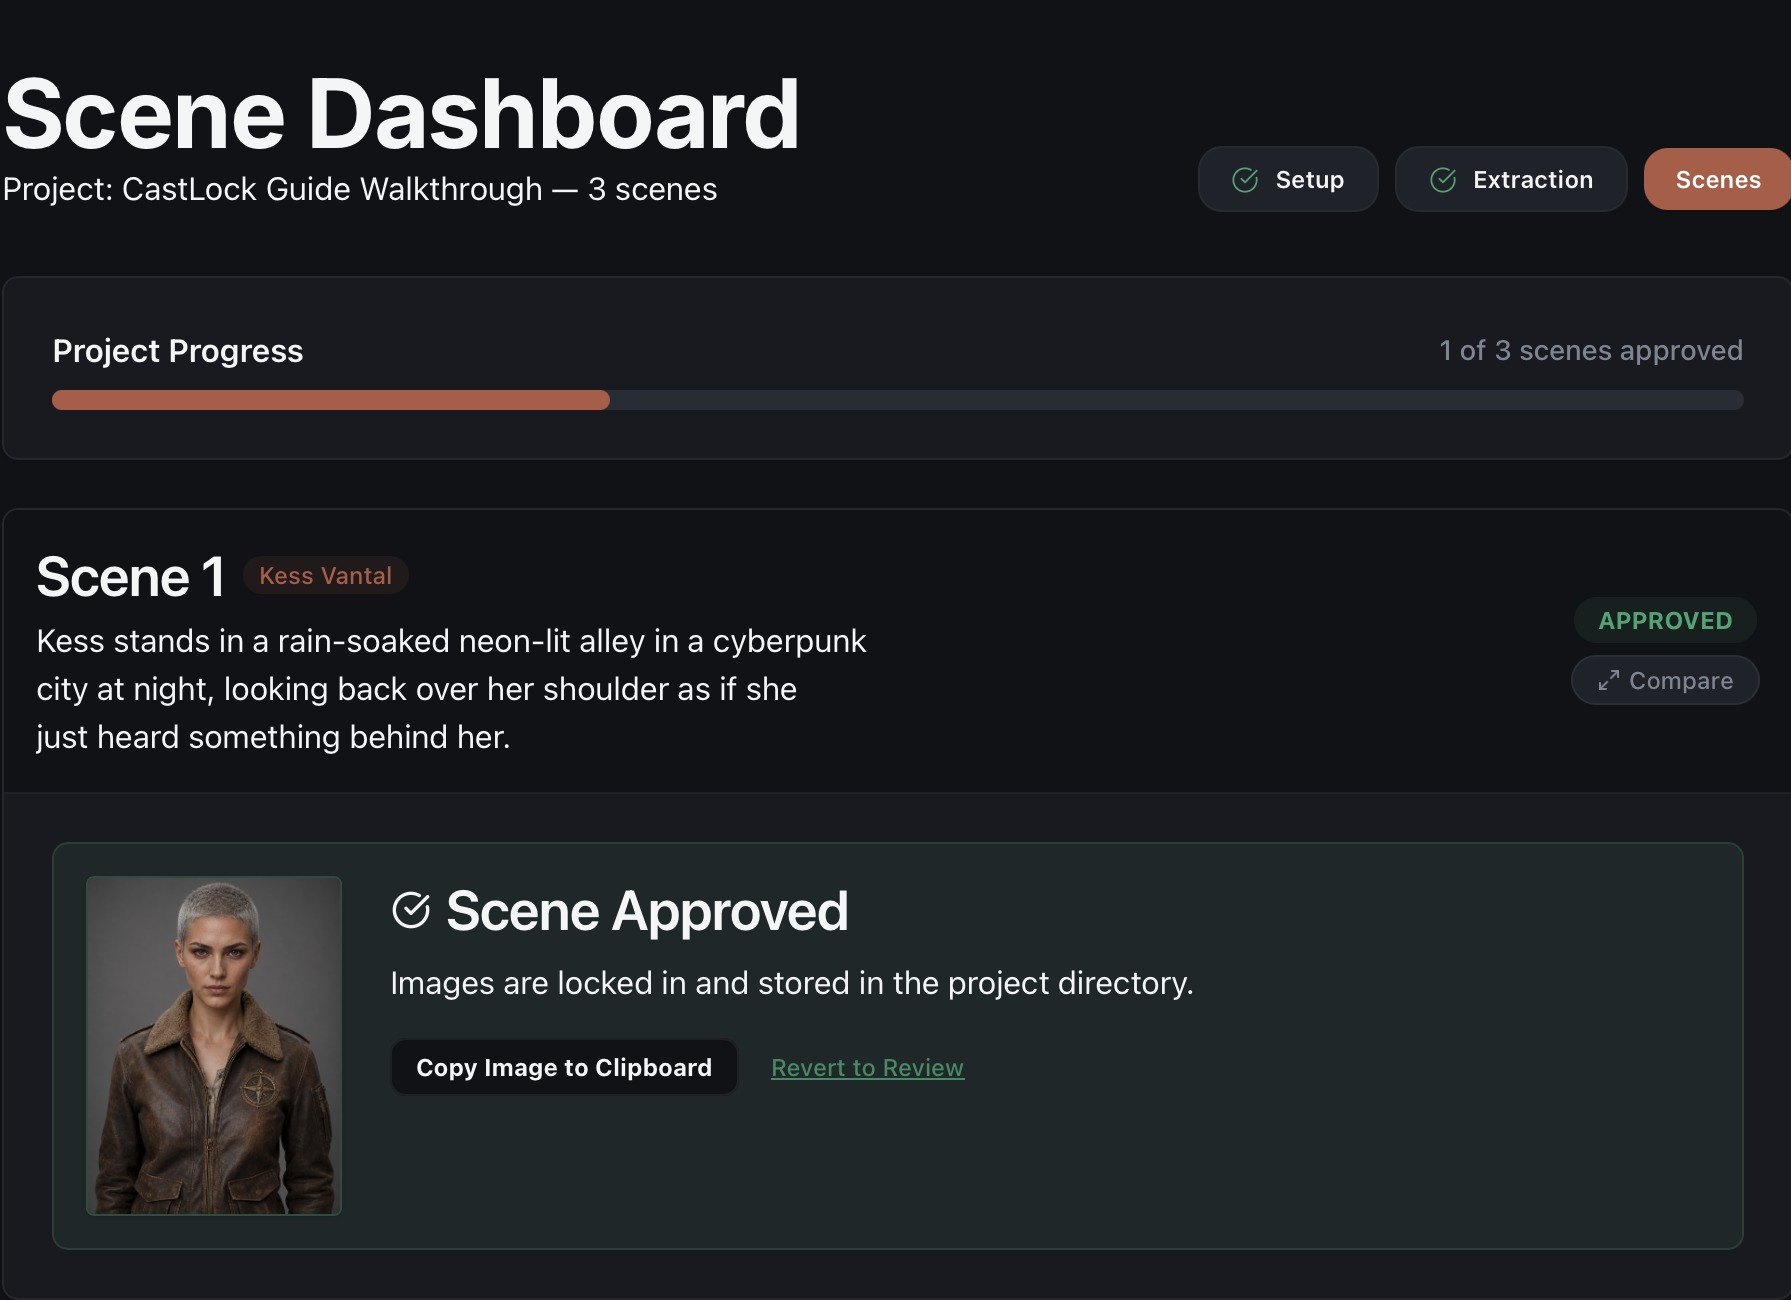
Each scene gets its own compiled prompt, built from the scene description, lighting, and the character's full visual identity: clothing, color palette, consistency anchors, and everything else locked in during extraction. Two buttons sit next to it. Copy Prompt does what it says. Switch to Browser brings Safari or Chrome to the front using an AppleScript-based tab reuse (or opens a new tab if neither is running), but it doesn't pre-fill or auto-navigate the prompt into the AI tool for you — copy the prompt first, switch over, then paste it in yourself.
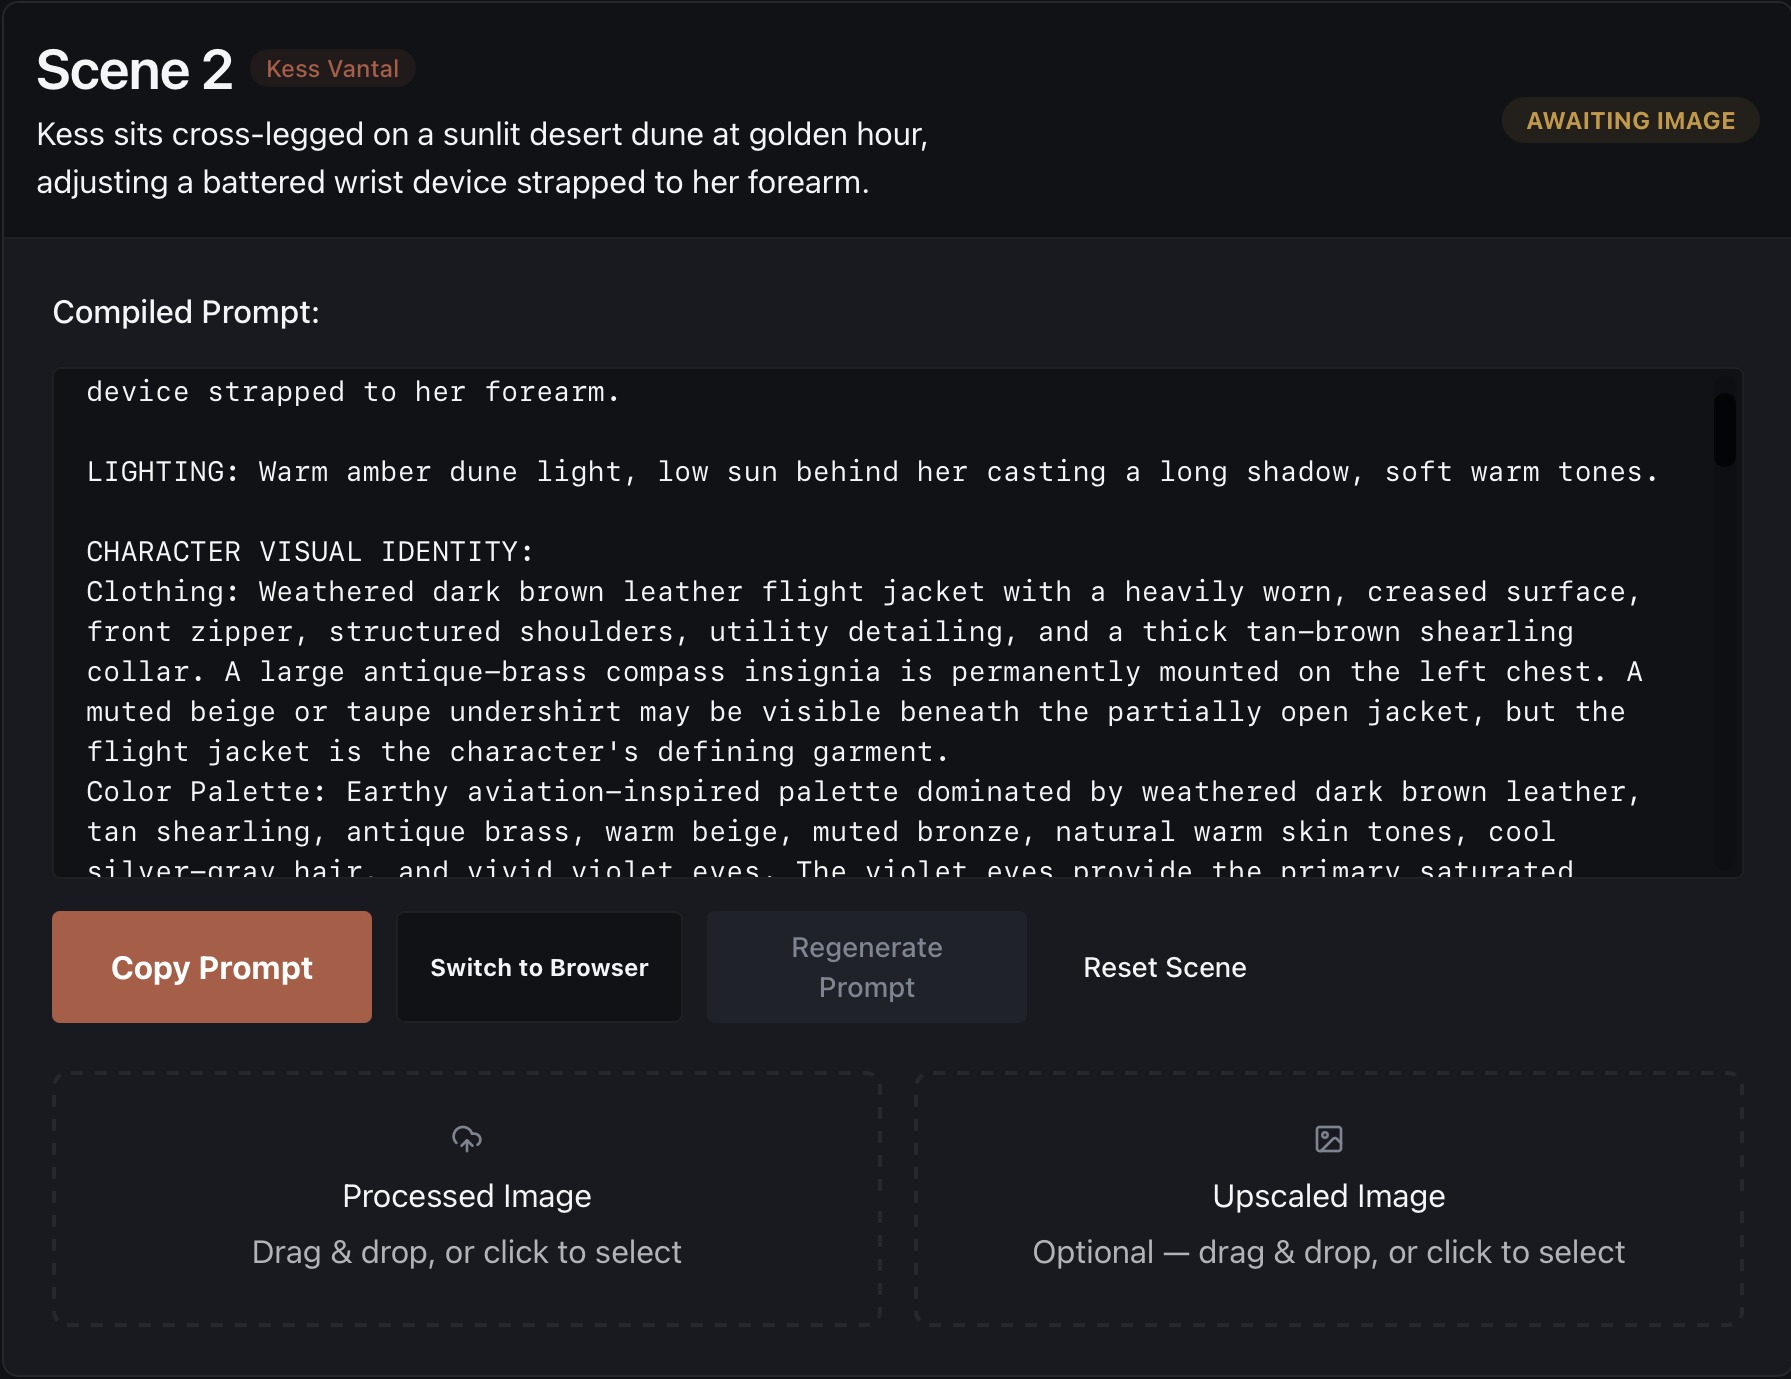
Below the prompt are two drag-and-drop slots: one for the Processed Image, and an optional one for an Upscaled Image. Once you approve a scene, it locks in and gets stored in the project directory. From there, the approved-state card shows the final image alongside Copy Image to Clipboard and Revert to Review, in case you change your mind.
Deleting a project
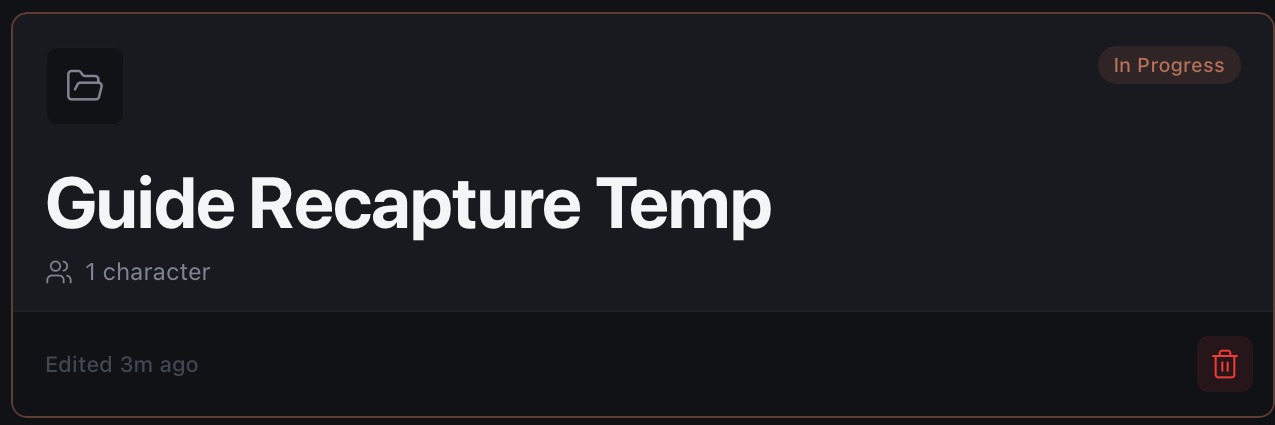
Click the trash icon on a project card, and it deletes right away, with no confirmation dialog. Its characters don't go with it, though. They land in an "Unassigned / Roster" group inside the Cast Library, the same block-don't-cascade approach CastLock uses for workspace deletion.
Delivery Hub
Once every scene is approved, final packaging pulls it all together into one ZIP: a character bible PDF, the approved scene images, and each character's individual JSON preset.
Cast Library
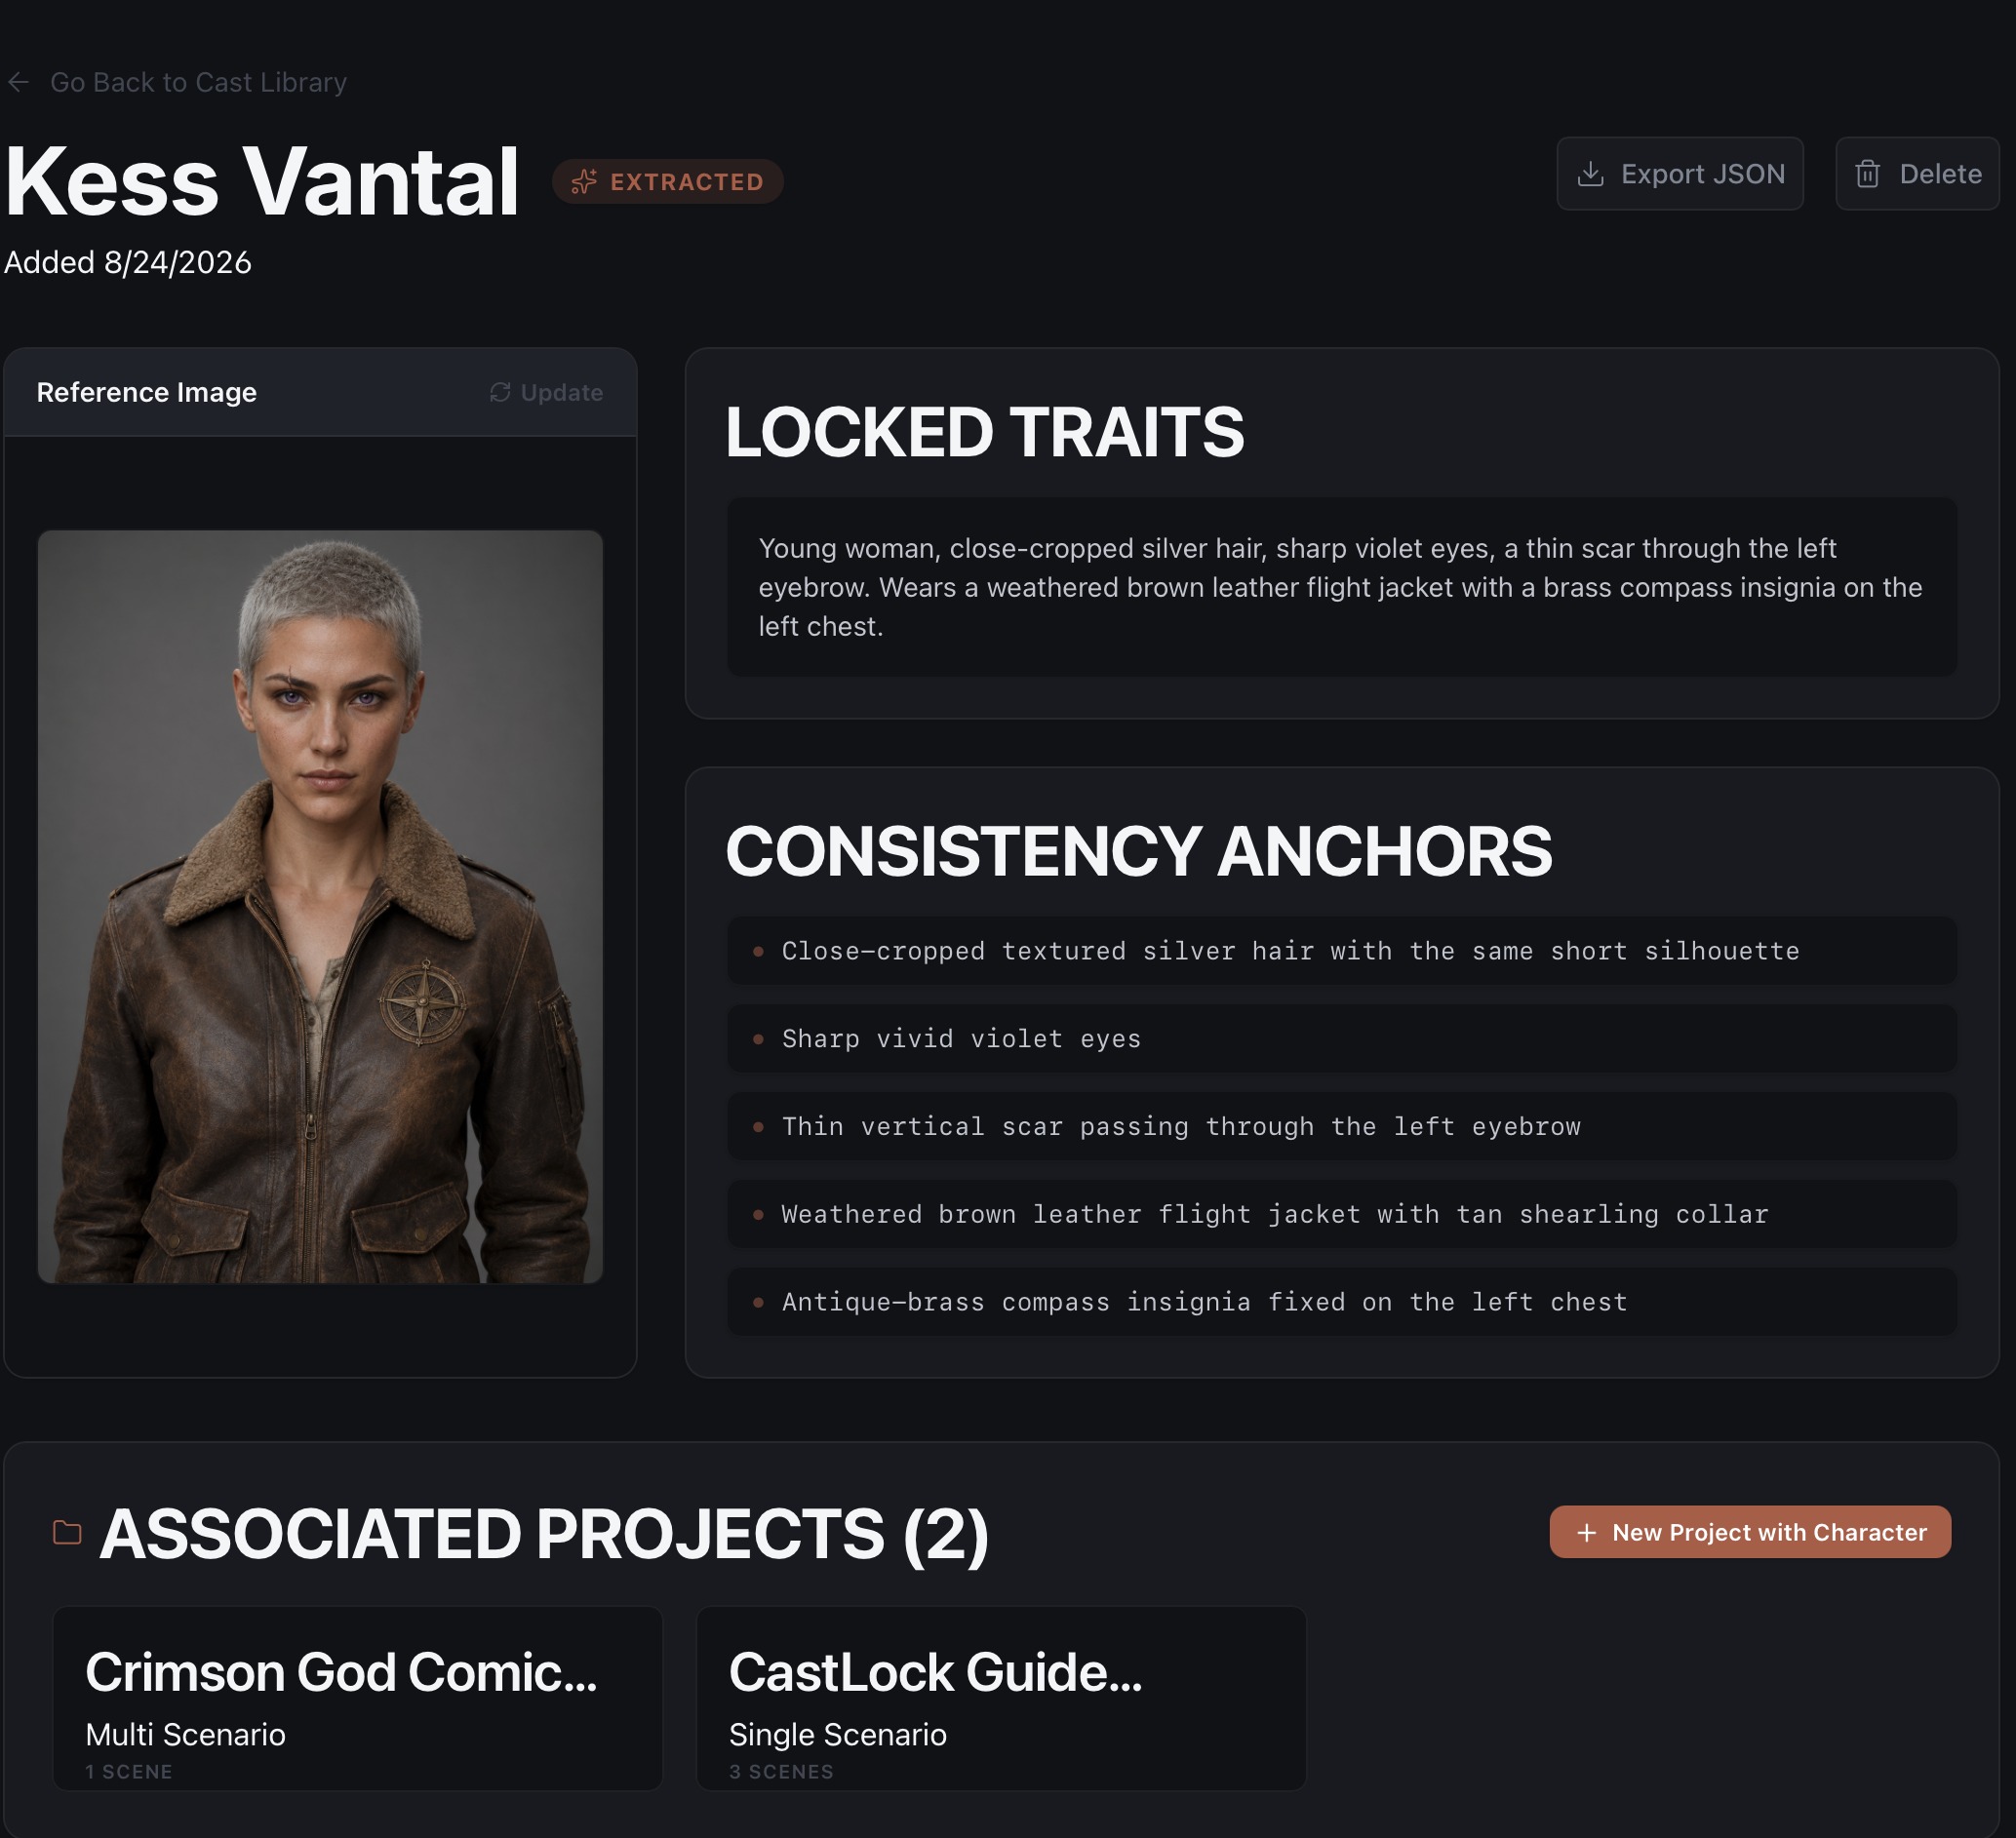
The Cast Library holds every character you've extracted or created in this workspace, and it sticks around independent of any single project. Characters are organized into groups, usually named after whichever project they first came from.
Each character's card shows its Locked Traits, Consistency Anchors, and a status tag: BASELINE if you entered it manually, EXTRACTED if it went through the extraction flow. Copy JSON, download, and delete icons sit alongside.
Adding a character directly
Click "+ New Character" and a simple modal opens: name, locked traits, and an optional reference image. This is direct manual entry, not the extraction flow, so you won't see Select-from-Library or Import-JSON shortcuts here — you're already in the library, after all.
Reusing a character across projects
This is the whole point of the Cast Library. Open any project's setup form, click "Select from Library," and you'll see a list of your existing characters with a preview of their traits. Pick one, and CastLock auto-fills that roster slot's name and visual traits straight from the saved record. It works end to end, including reusing the same character across several projects at the same time.
"Import JSON" skips CastLock's own interface entirely and opens your Mac's native file picker. Point it at a character JSON you exported earlier, and it loads straight in.
Reference Sheet
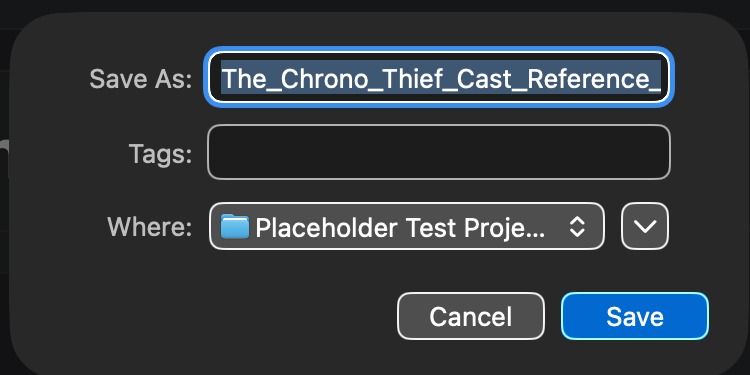
Every cast group has its own "Reference Sheet" button. Click it, and CastLock generates a PDF and prompts you with a native macOS save dialog to choose where it goes.
New Cast Group
On the Projects page, next to "+ New project" in the top right, you'll find "+ New Cast Group." Click it, name the group, and check off which existing Cast Library characters belong in it, then click "Create Group" to save. It's a manual, deliberate way to bundle characters together outside of any single project, separate from the grouping CastLock does automatically per project.
Deleting a character
Click the trash icon, and the character is gone right away. There's no confirmation dialog, consistent with how CastLock handles project and workspace deletion too.
General & Settings
Open Settings with Cmd+, and you'll find one simple panel: a Working Directory field (the app-level default, separate from each project's own), the App Version, a Support email link, and Replay Welcome Guide, which re-runs the walkthrough you saw on first launch.
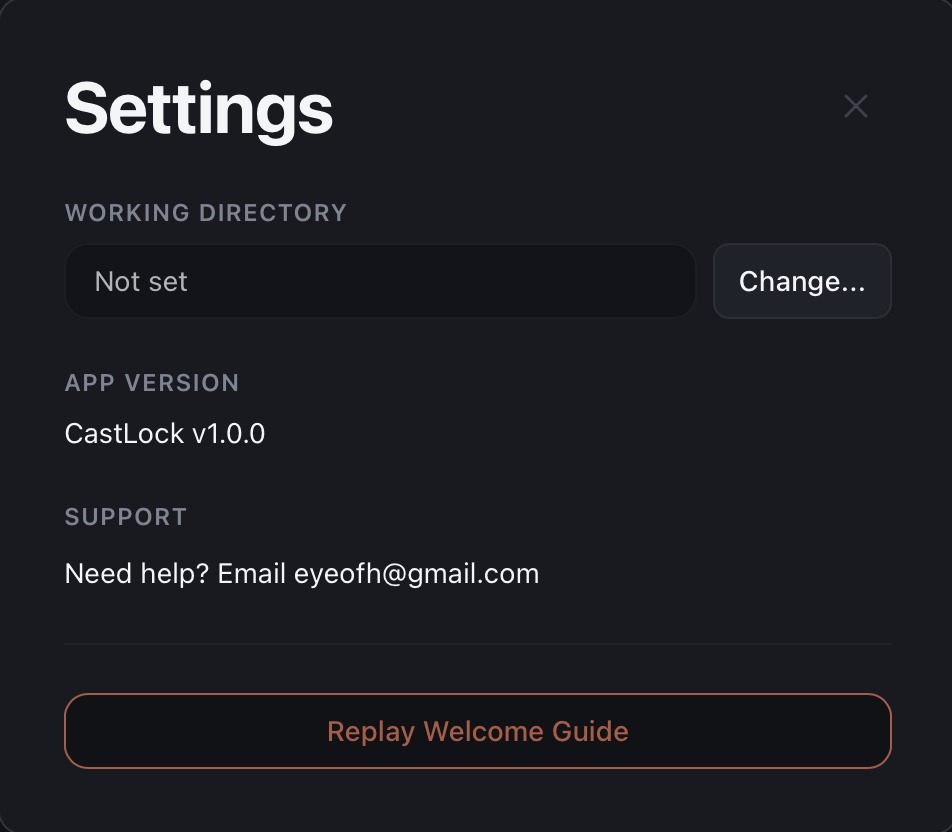
There's no "Hard Reset All App Data" button hiding in here, or any other destructive action anywhere in Settings.
FAQ
Why does my AI-generated character keep changing?
Gemini and ChatGPT don't remember your character between images. Every new prompt starts from zero, so small details drift — hair color shifts, the face changes, the outfit from panel three doesn't match panel four. It's not just about asking for the same shot twice, either: put that character in a forest, then a hallway, then a rooftop at night, and each new scene resets from zero unless something tells the model otherwise. CastLock locks the traits that matter into one reusable prompt, so the model gets the same instructions every time, in every scene.
Does CastLock work with Midjourney?
Not yet. CastLock supports Gemini and ChatGPT today. Midjourney's prompt style is different enough — short, tag-based — that it needs its own version. That's planned, not shipped.
Is CastLock a subscription?
No. $50, once. No monthly charge, no tiers, no upsell screen down the road.
Does CastLock generate the images for me?
No. CastLock compiles the prompt — you paste it into your own Gemini or ChatGPT account and generate there. No API costs passed to you, no vendor lock-in, and your work stays in the tool you already have open. What CastLock does instead: keep every character, every scene, and every approved image organized in one place, so nothing gets lost between projects.
What happens if I delete something by accident?
Projects, characters, and empty workspaces all delete instantly with no confirmation prompt, so it's worth being deliberate with the trash icon. One safety net: deleting a project doesn't delete its characters — they move to an "Unassigned / Roster" group in the Cast Library instead of disappearing.
Who is CastLock built for?
Tabletop GMs running a campaign's worth of NPCs. Novelists tracking a cast across chapters. Indie devs, webcomic artists, worldbuilders — anyone generating the same character more than once and watching the face slide a little further every time.